The Notebooker webapp
Notebooker’s primary interface is a simple webapp written to allow users to view and run Notebooker reports. It first displays all unique template names which have ever run, and a drill-down view lists all results for that notebook template in a handy grid, allowing for rerunning and parameter tweaking. The entrypoint used to run Notebooks via the webapp is the same as the external API; as long as you are using the same environment (e.g. within a docker image) you will get consistent results.
Report dashboard
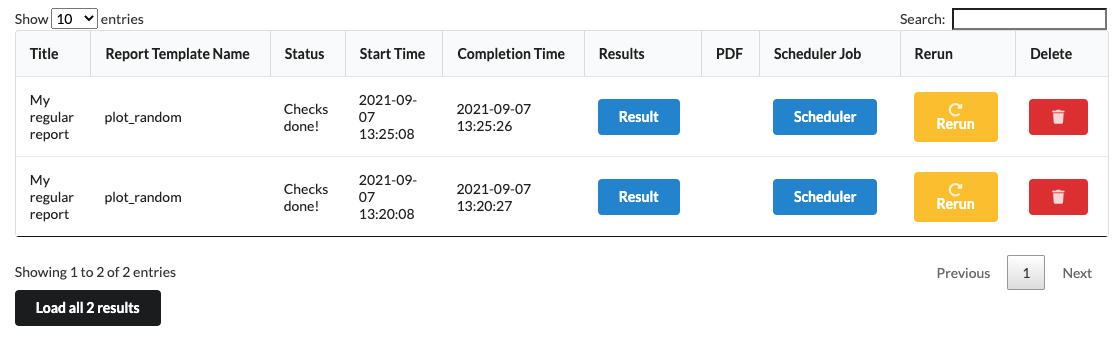
The home page of the Notebooker webapp displays an overview of all reports which have recently run.
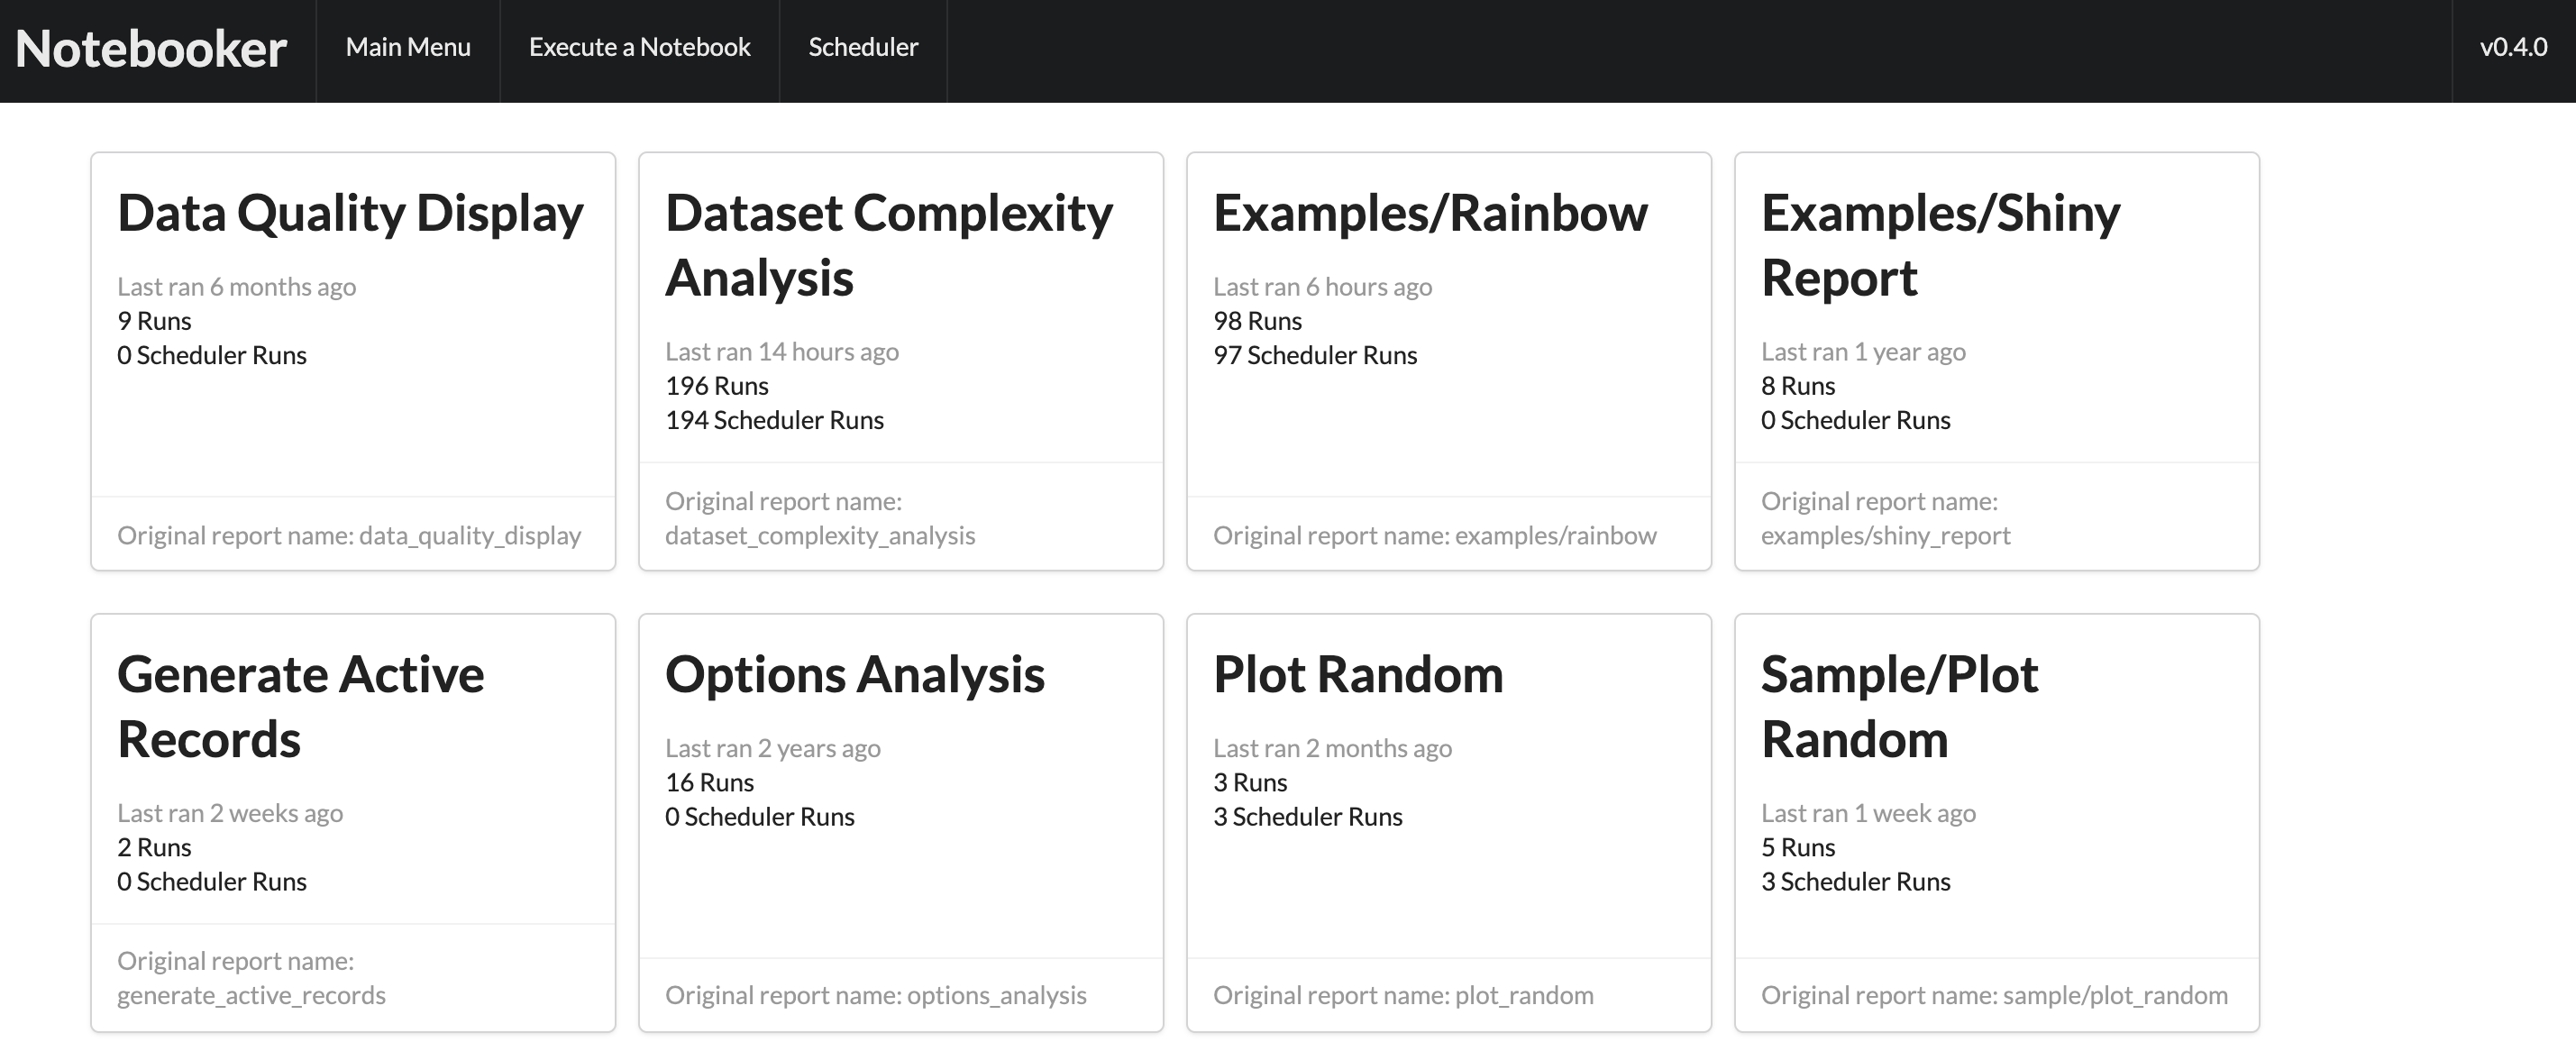
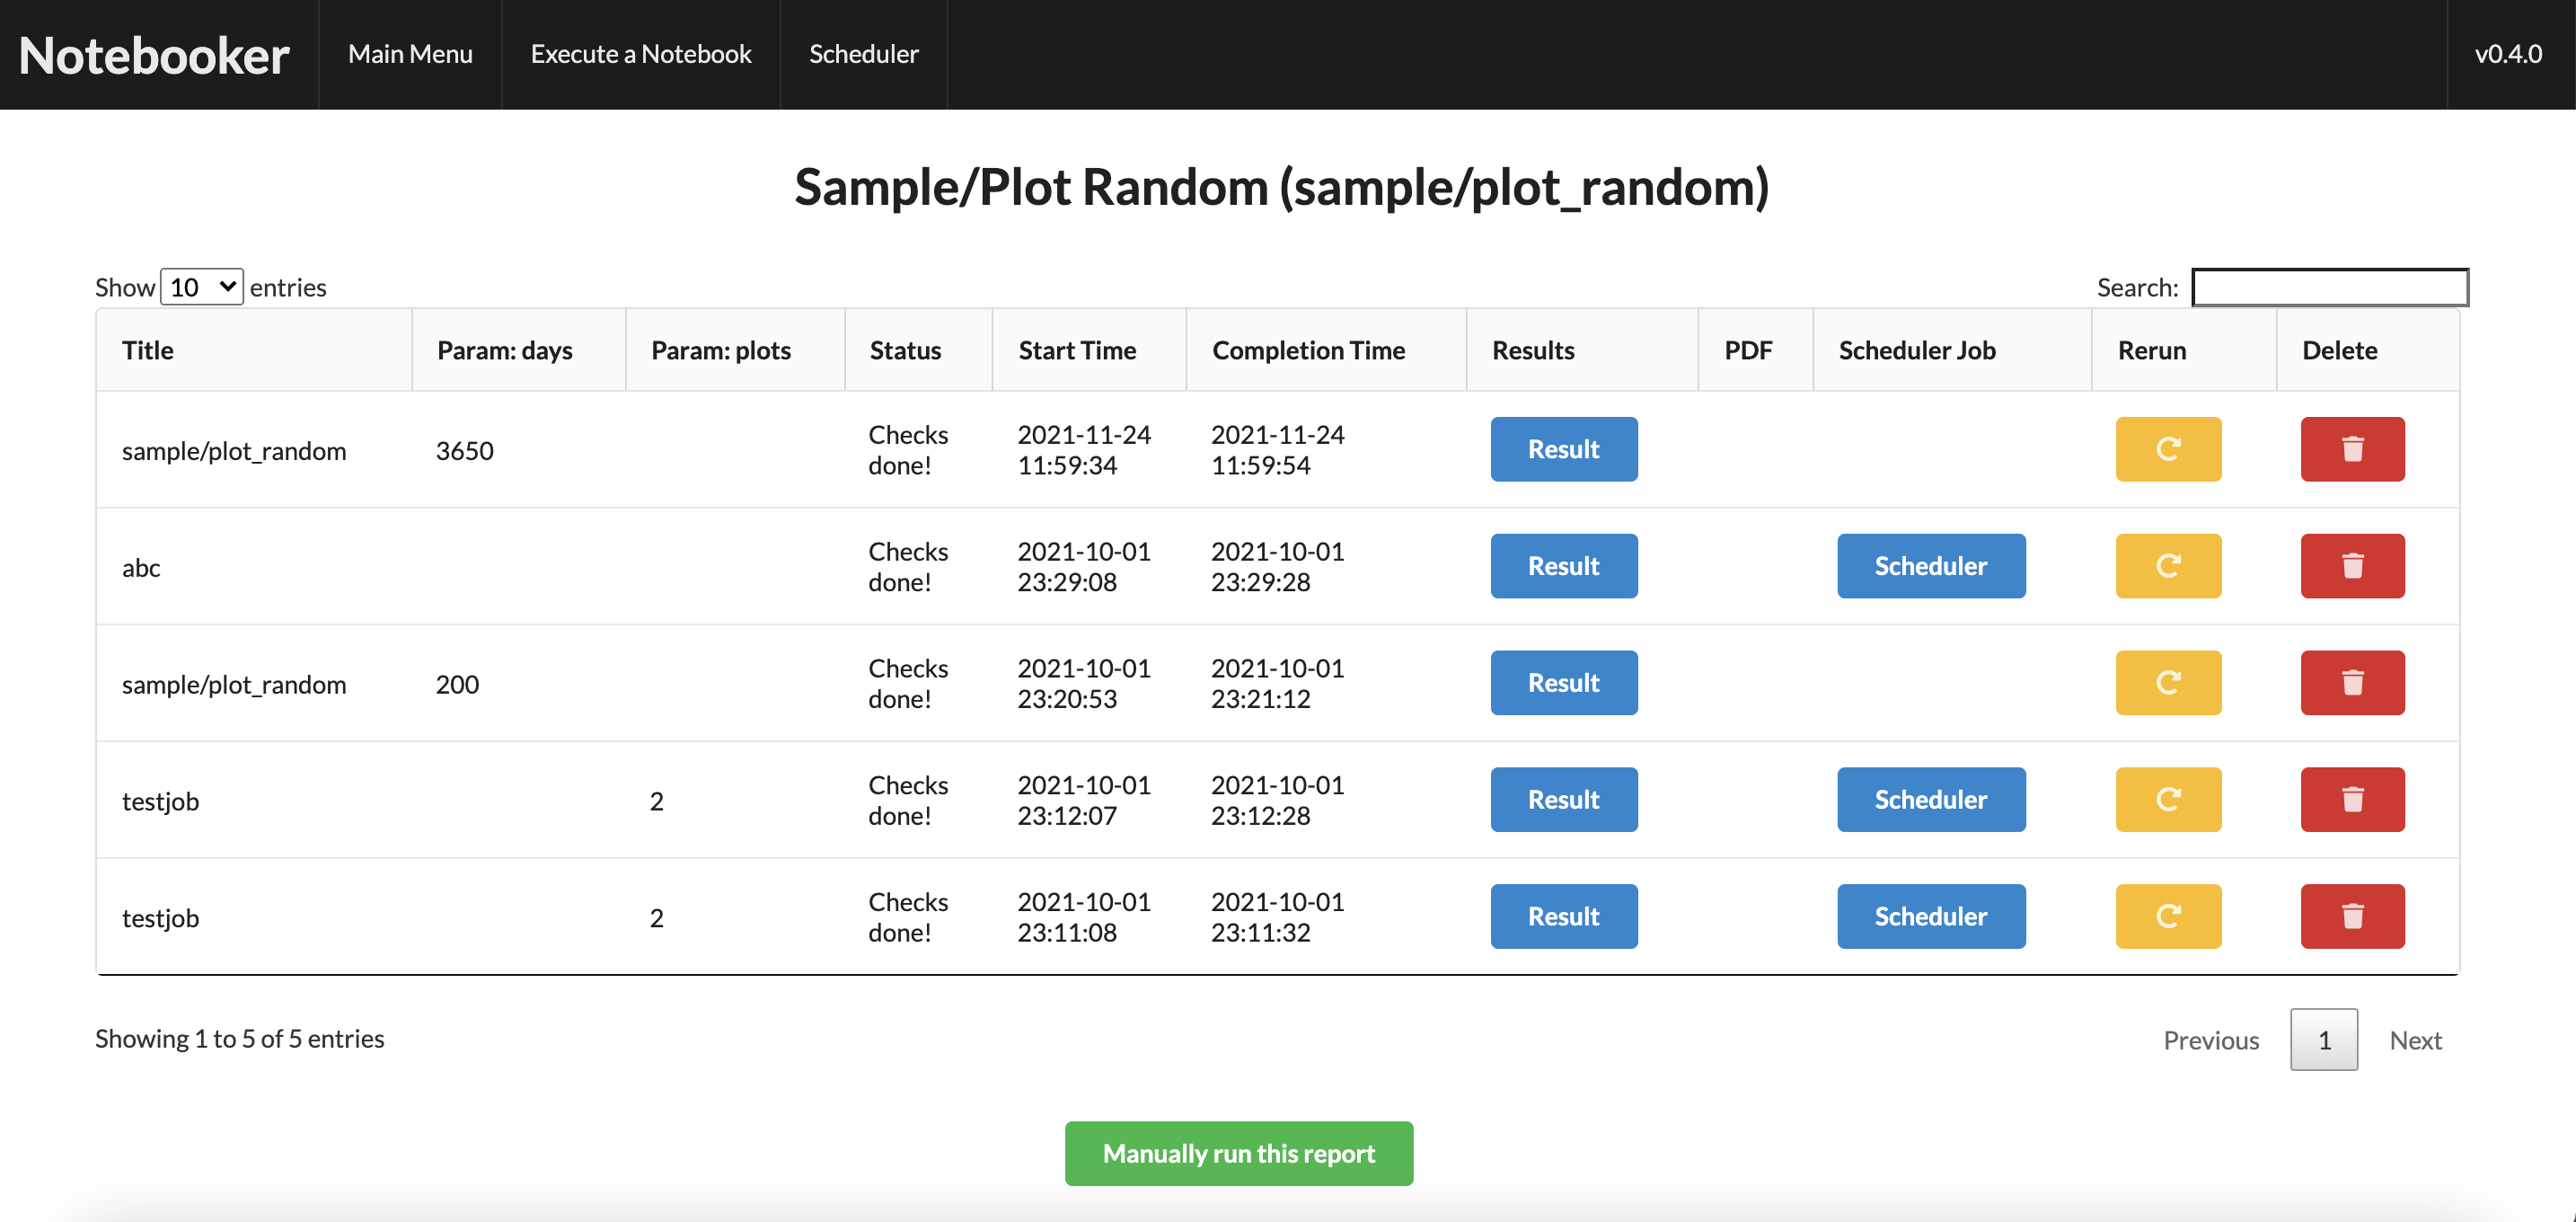
Clicking on one of these elements will bring up an overview of all reports which have recently run. It is possible to view each full report by clicking “Result”. It’s also possible to rerun, delete, and copy parameters of each report in the grid.
Running a report
Warning
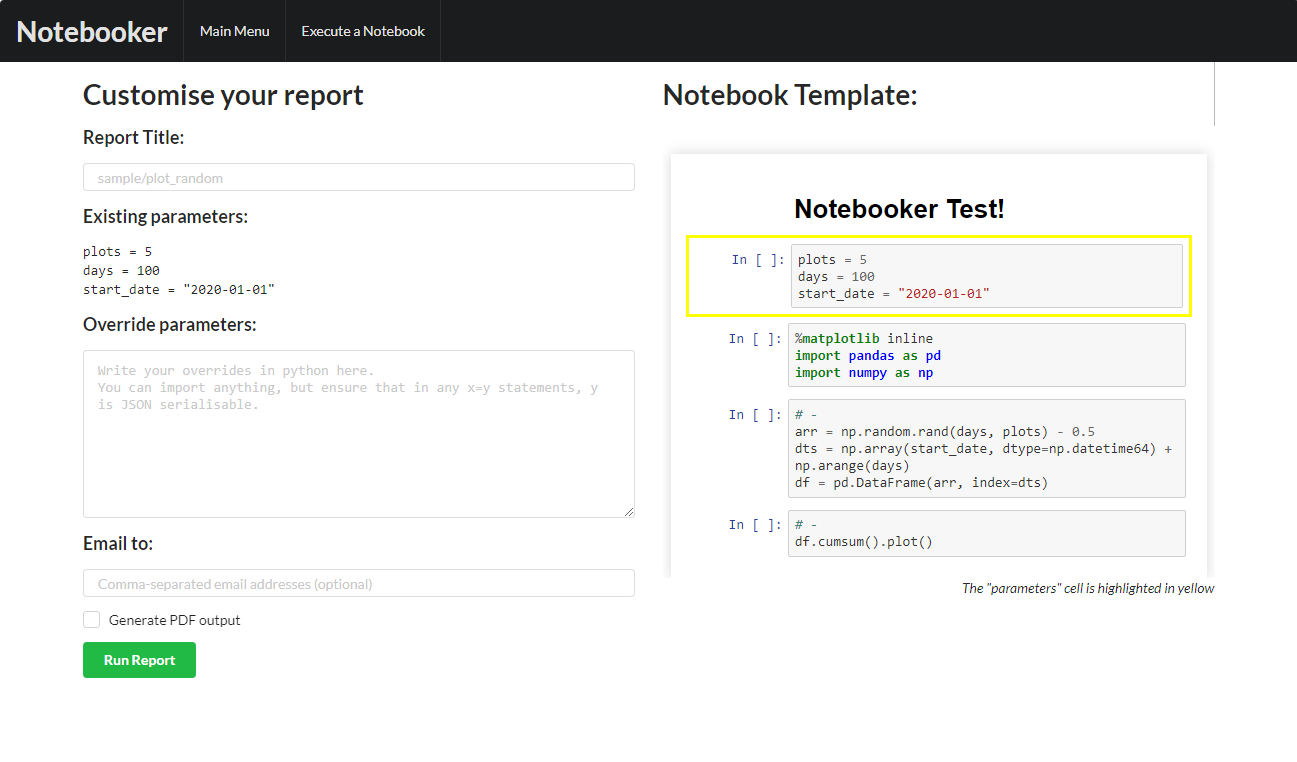
In order to prevent users having to write JSON, the Override parameters box actually takes raw python statements and converts them into JSON. Therefore, it is strongly recommended that you run Notebooker in an environment where you either completely trust all of the user base, or within a docker container where executing variable assignments will not have any negative side-effects.
Customisable elements:
Report Title - the name of the report which will appear on the main screen and email subject upon completion. Can be left blank.
Override parameters - the values which will override the parameters in the report (in python). Can be left blank.
Email to - upon completion of the report, who should it be emailed to? Can be left blank.
Generate PDF output - whether to generate PDFs or not. Requires xelatex to be installed - see Exporting to PDF
Hide code from email and PDF output - whether to display the notebook code when producing output emails and PDFs.
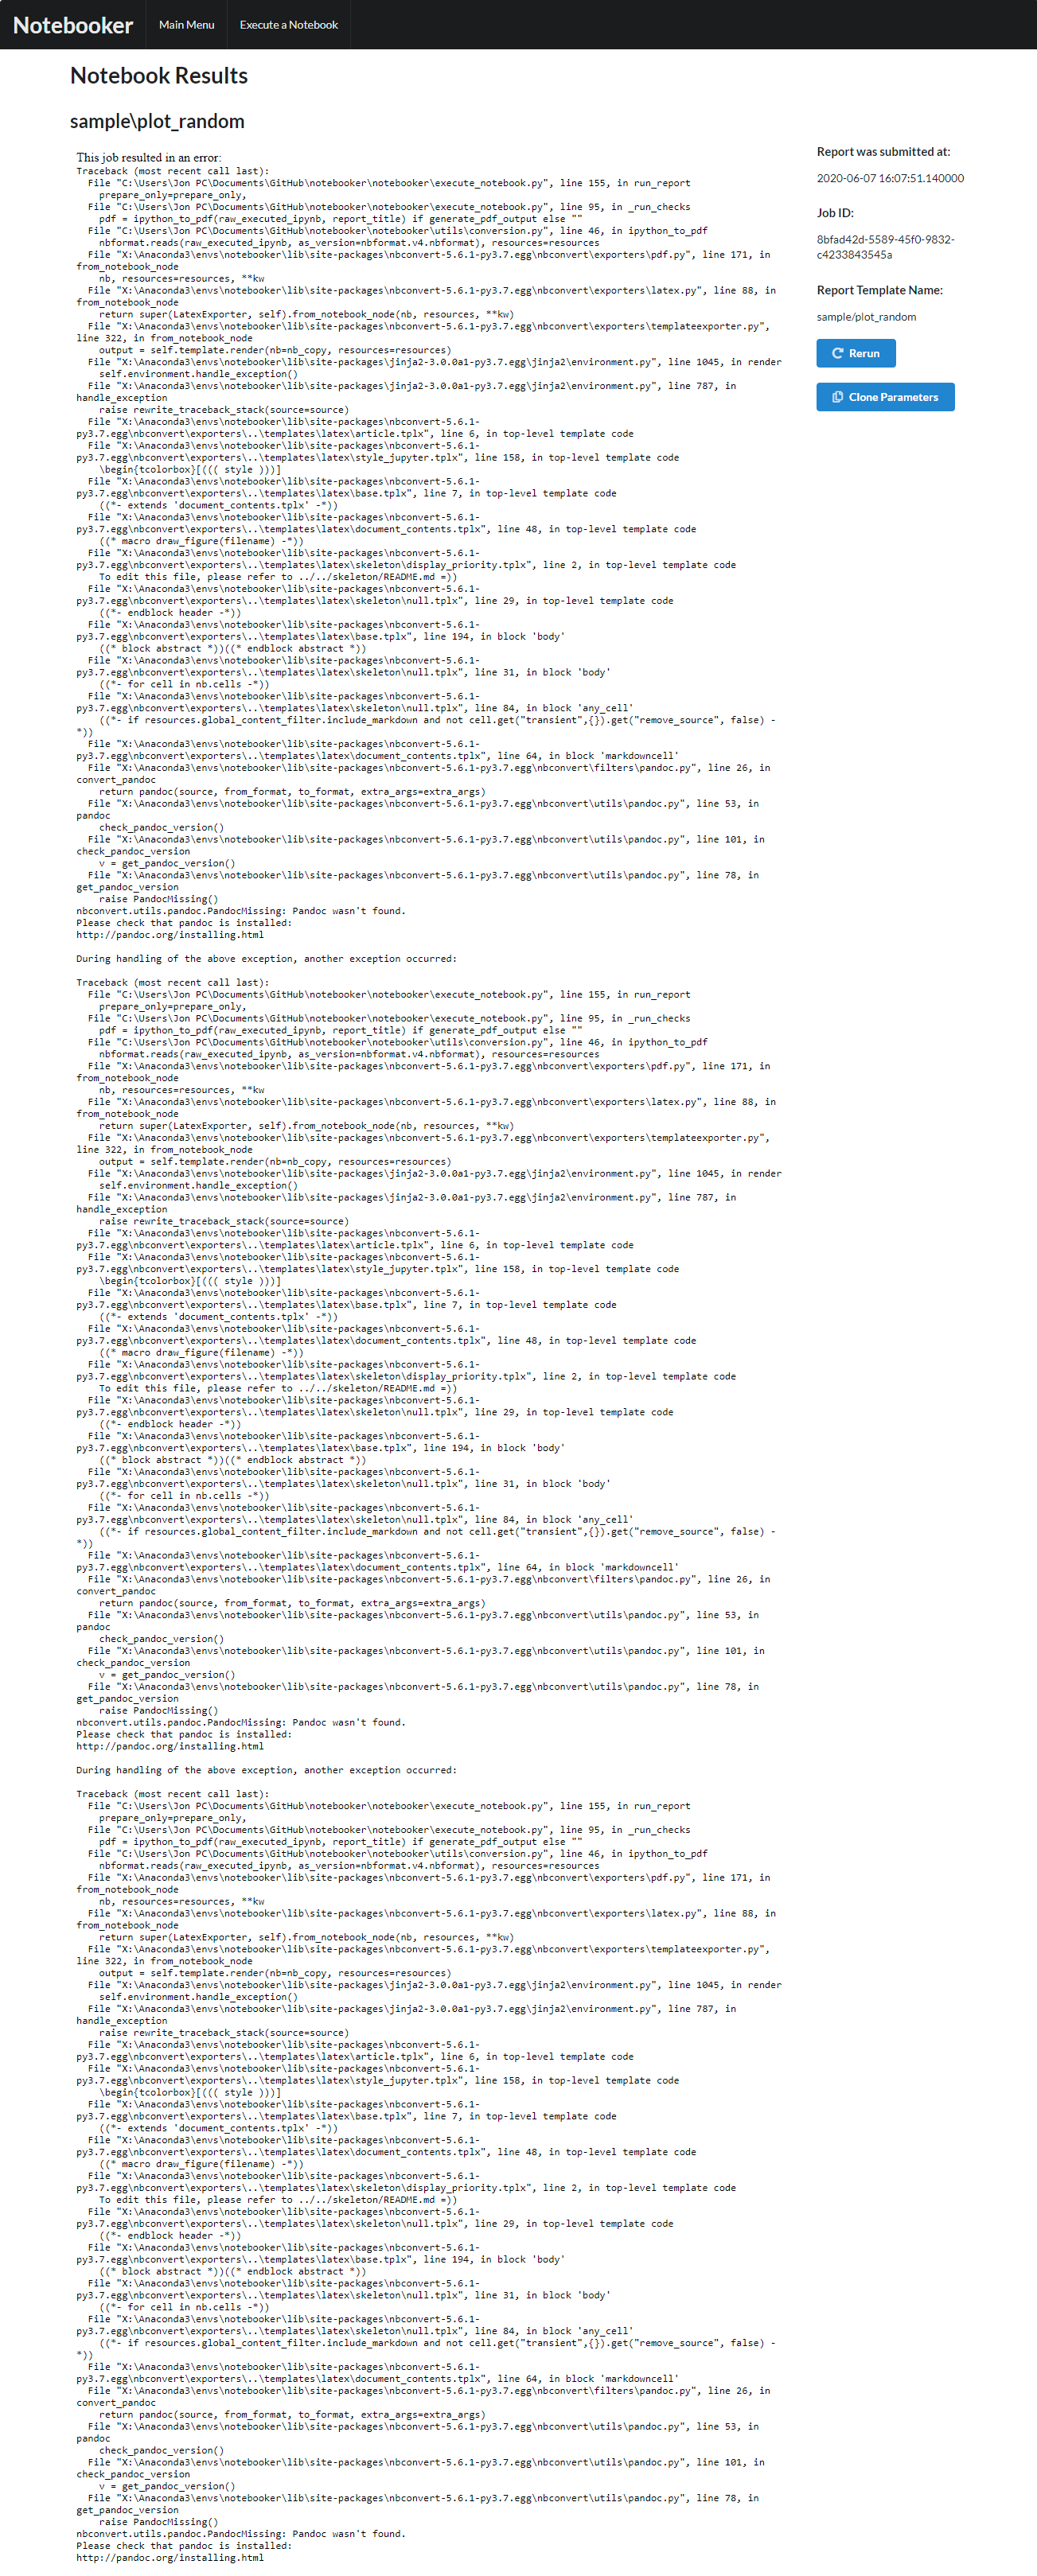
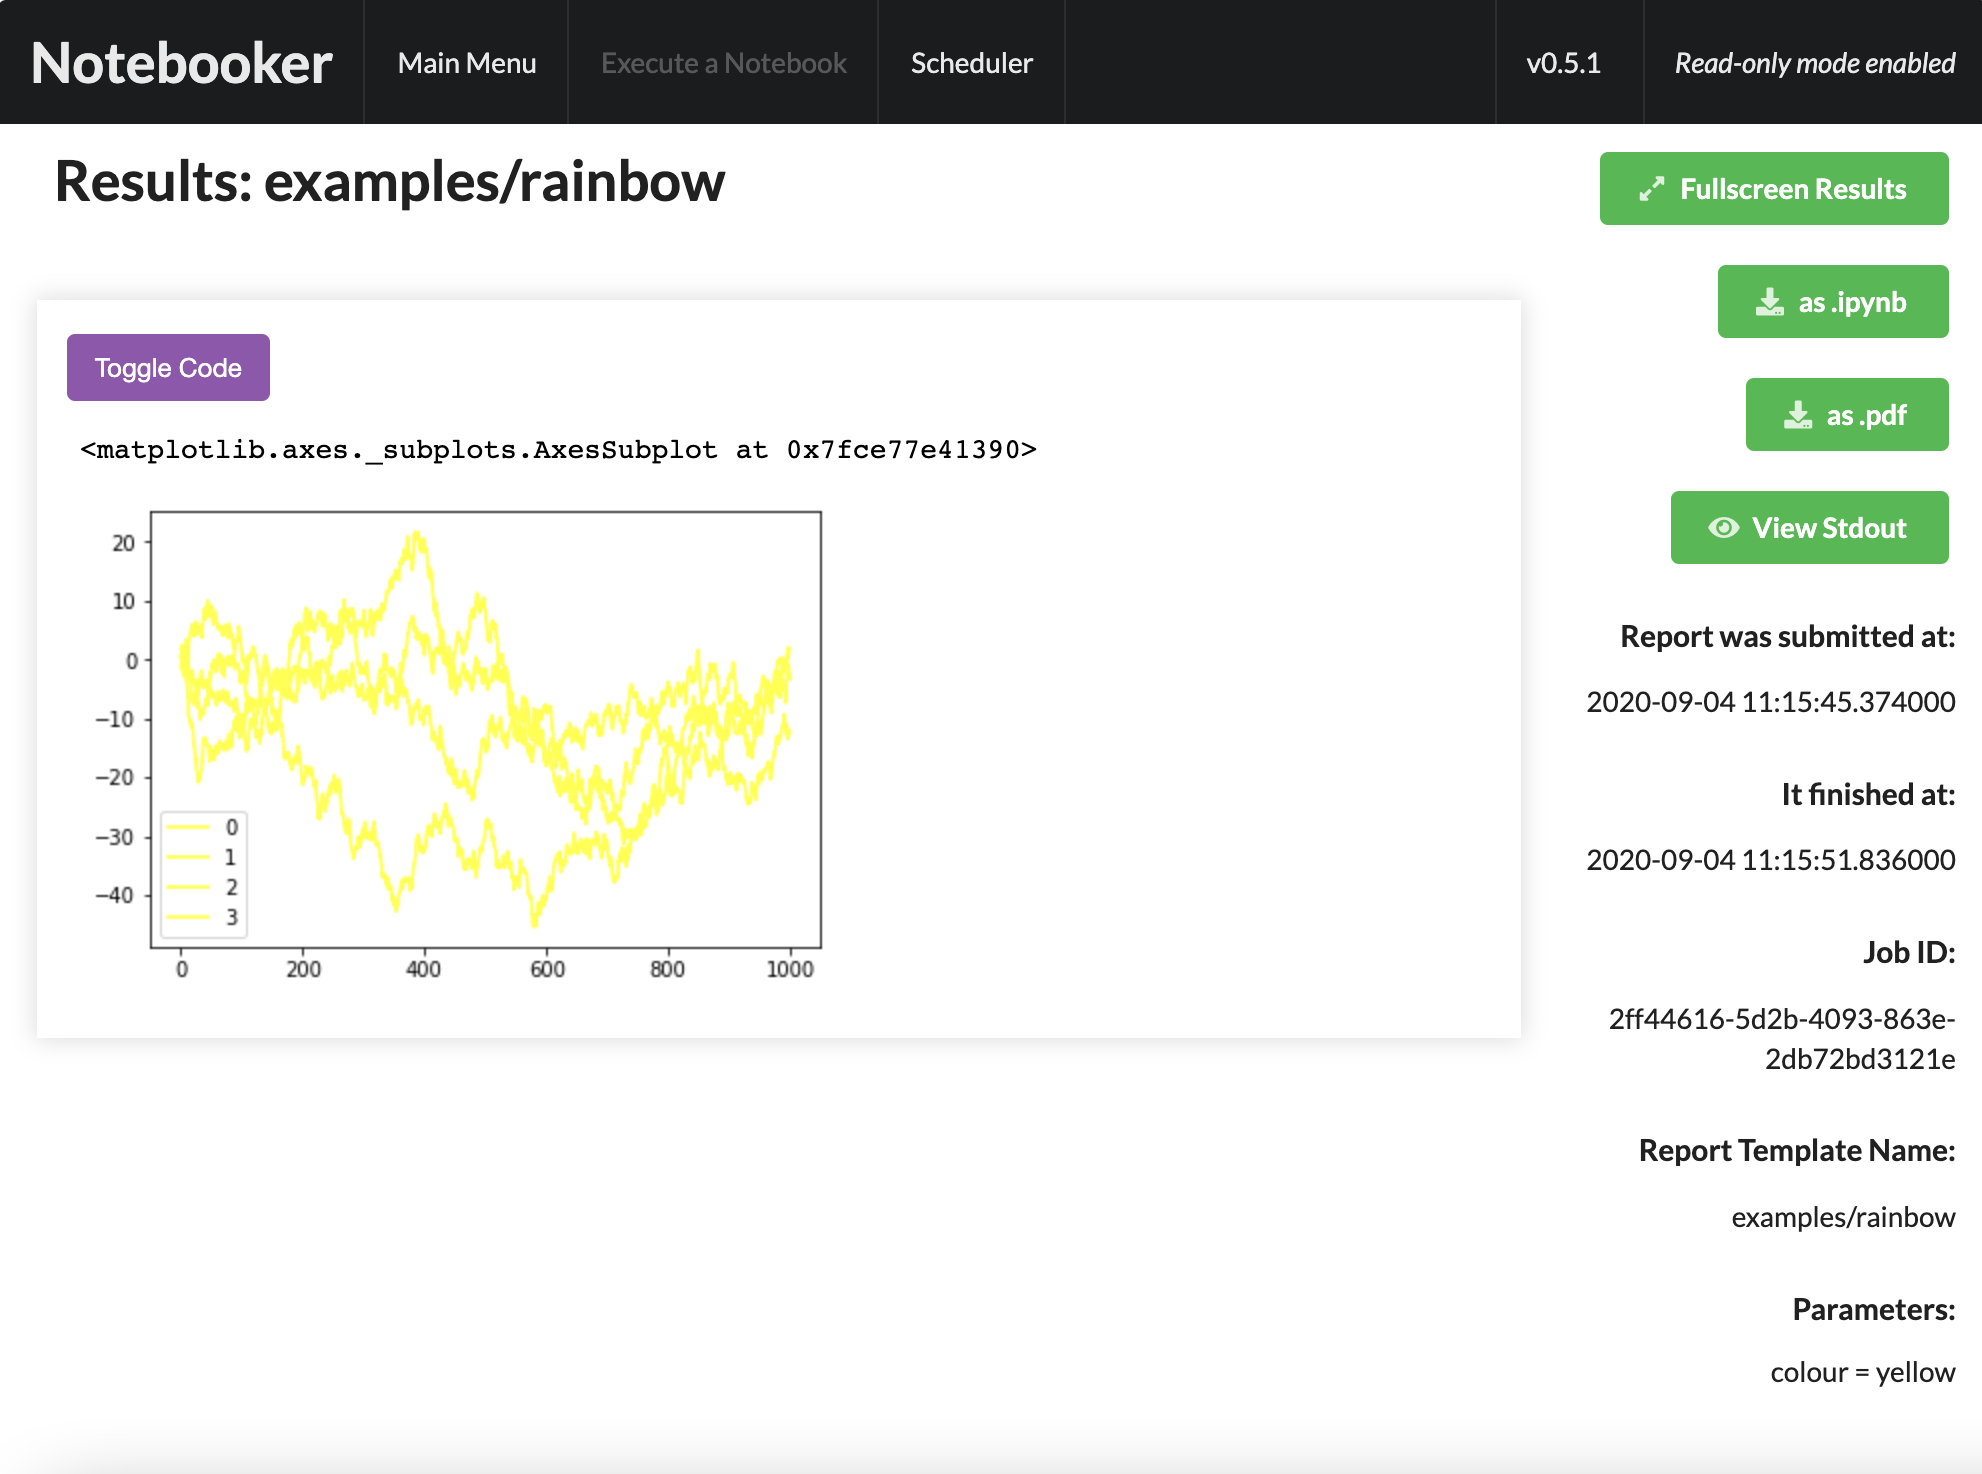
Viewing results
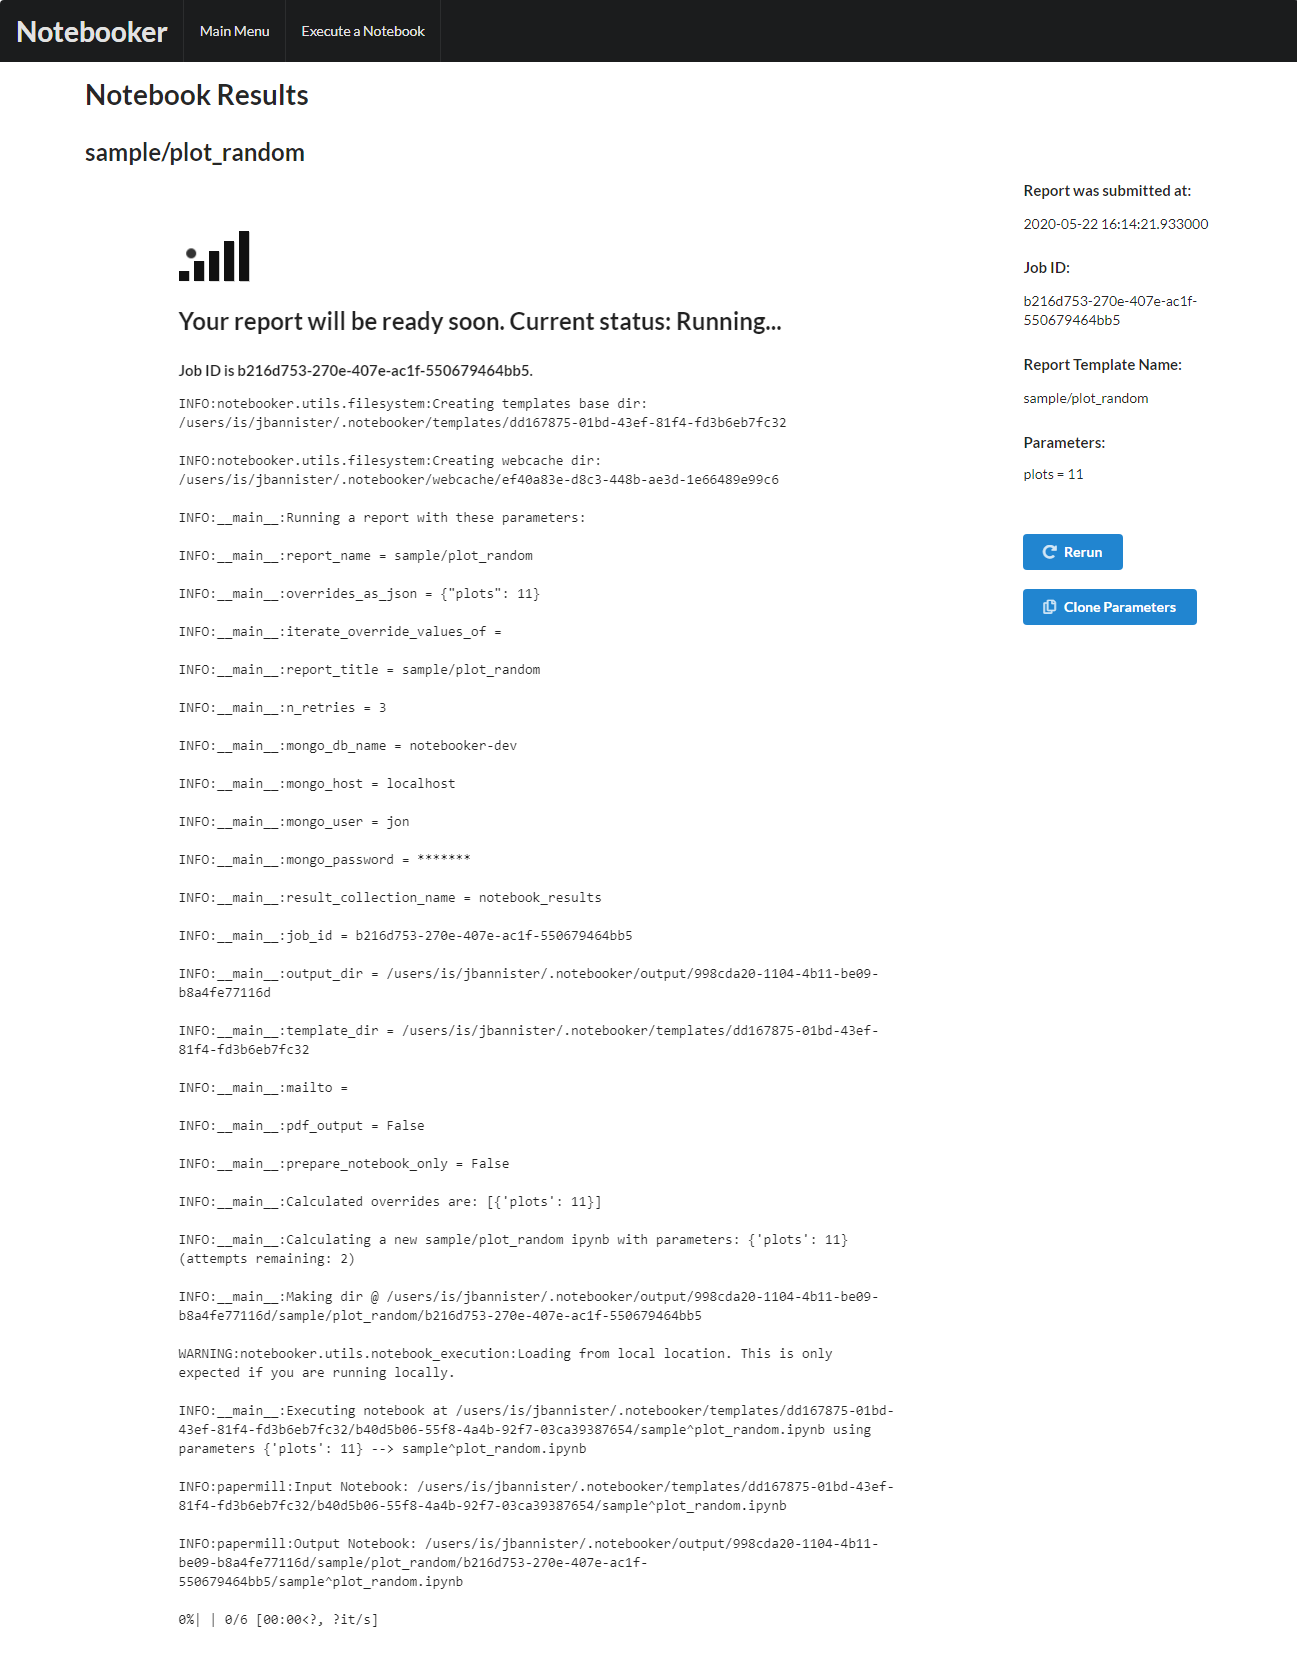
If the job fails, the stack trace will be presented to allow for easier debugging.
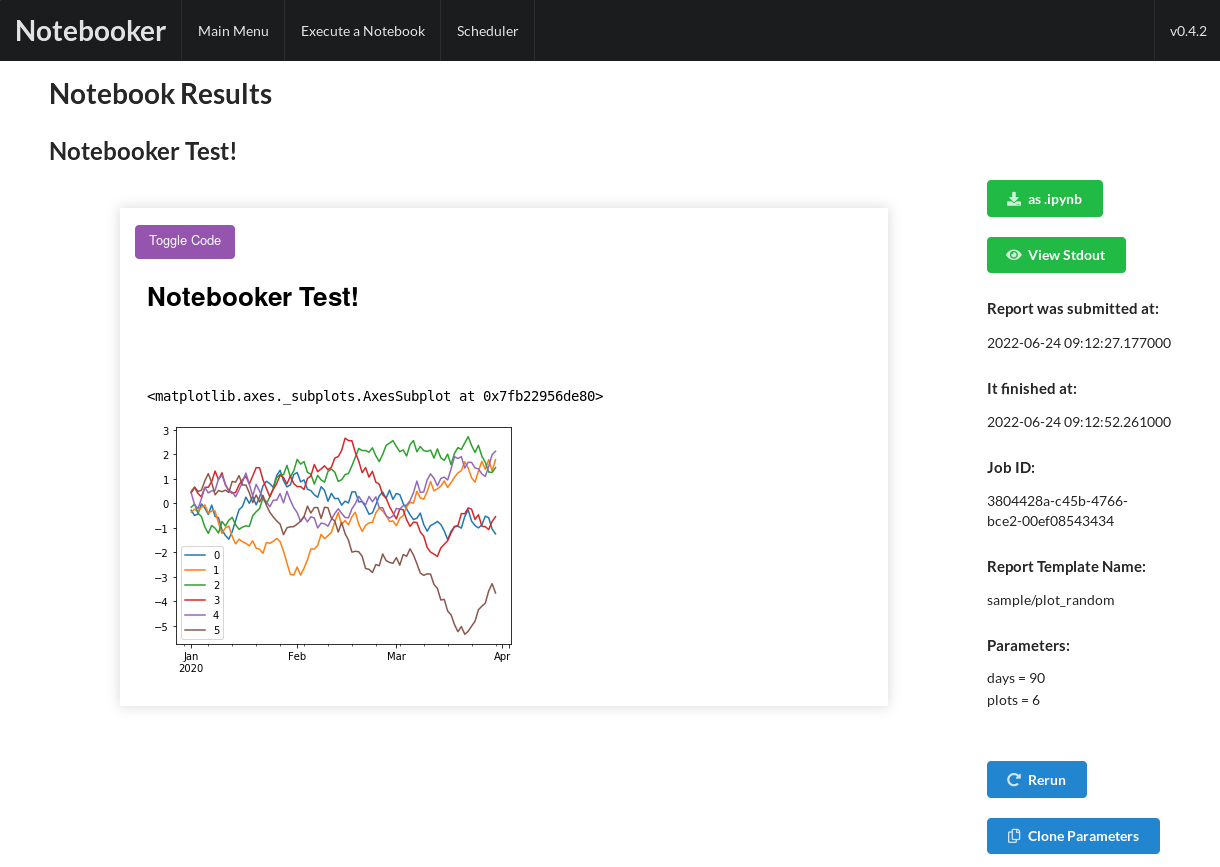
It is also possible to either rerun a report from this view, or to clone its parameters. If it was saved as a PDF, you can download using the button on the sidebar, or you can download as raw .ipynb. You can view and copy the stdout from the run via a modal by clicking the “View Stdout” button on this view.
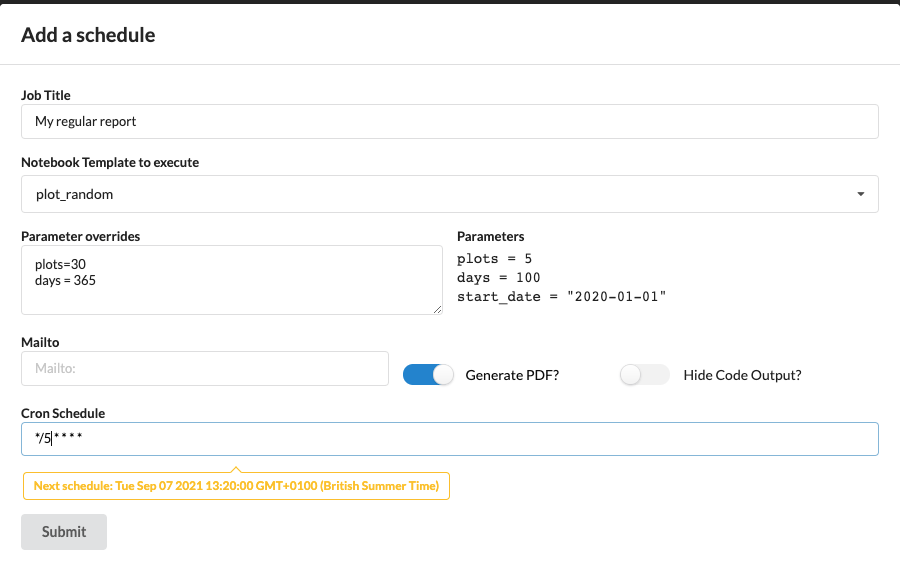
Scheduling a report
Note
Available from version 0.3.0 onwards.
Once you are happy with your report, you can choose to schedule the report within the Notebooker webapp. Setting up a schedule is relatively simple, and it begins in the Scheduler tab.
Warning
In order for a schedule to be executed successfully, the Notebooker webapp must be running. Upon restart, the latest schedule is not executed and instead the scheduler will wait until the next scheduled slot.
First, click the “Add a Schedule” button:
Then fill out the form. Please note that the schedule is in Cron syntax - please see the APScheduler docs for more information.
Once the schedule has been saved, it will appear in the list under the scheduler tab. If you wish to modify a schedule, you can click on the row and it will pop up the same modal. Please note that the report name cannot be changed. Reports can also be deleted from this table by clicking on the trash icon.

Once the schedule has been triggered and the job has run, a new entry will appear on the homepage and the results will be accessible. You can tell it has been scheduled by the presence of a Scheduler button.
Rerunning a report
There are three ways to rerun a report in the Notebooker webapp.
“Rerun” from the homepage
“Rerun” from the result page
“Clone parameters” from the result page
The first two options work the same - you rerun the report with exactly the same parameters again. All reruns have the title “Rerun of <prior report title>”. The latter option, clone parameters, takes you to the “run a report” screen but with the parameters from that report copied into the “override parameters” box.
Configuring the webapp
The webapp itself is configured via the command line notebooker-cli:
notebooker-cli
notebooker-cli [OPTIONS] COMMAND [ARGS]...
Options
-
--version¶ Show the version and exit.
-
--notebook-kernel-name<notebook_kernel_name>¶ The name of the kernel which is running our notebook code.
-
--output-base-dir<output_base_dir>¶ The base directory to which we will save our notebook output temporarily. Required by Papermill.
-
--template-base-dir<template_base_dir>¶ The base directory to which we will save our notebook templates which have been converted from .py to .ipynb.
-
--py-template-base-dir<py_template_base_dir>¶ The base directory of the git repository which holds the notebook templates as .py files. If not specified, this will default to the sample directory within notebooker.
-
--py-template-subdir<py_template_subdir>¶ The subdirectory of the git repository which contains only notebook templates.
-
--notebooker-disable-git,--disable-git¶ If selected, notebooker will not try to pull the latest version of python templates from git.
-
--default-mailfrom<default_mailfrom>¶ Set a new value for the default mailfrom setting.
-
--running-timeout<running_timeout>¶ Timeout in minutes for report execution
-
--serializer-cls<serializer_cls>¶ The serializer class through which we will save the notebook result.
execute-notebook
notebooker-cli execute-notebook [OPTIONS]
Options
-
--report-name<report_name>¶ The name of the template to execute, relative to the template directory.
-
--overrides-as-json<overrides_as_json>¶ The parameters to inject into the notebook template, in JSON format.
-
--iterate-override-values-of<iterate_override_values_of>¶ For the key/values in the overrides, set this to the value of one of the keys to run reports for each of its values.
-
--report-title<report_title>¶ A custom title for this notebook. The default is the report_name.
-
--n-retries<n_retries>¶ The number of times to retry when executing this notebook.
-
--job-id<job_id>¶ The unique job ID for this notebook. Can be non-unique, but note that you will overwrite history.
-
--mailto<mailto>¶ A comma-separated list of email addresses which will receive results.
-
--error-mailto<error_mailto>¶ A comma-separated list of email addresses which will receive errors. Deafults to –mailto argument.
-
--email-subject<email_subject>¶ The subject of the email sent on a successful result.
-
--pdf-output,--no-pdf-output¶ Whether we generate PDF output or not.
-
--hide-code,--show-code¶ Hide code from email and PDF output.
-
--prepare-notebook-only¶ Used for debugging and testing. Whether to actually execute the notebook or just “prepare” it.
-
--scheduler-job-id<scheduler_job_id>¶ If available, it stores the id of the scheduler job which triggered this execution as part of the report.
-
--mailfrom<mailfrom>¶ Use this email in the From header of any sent email. If not passed, –default-mailfrom will be used
-
--is-slideshow¶ If specified, the notebook template’s output will be treated as a Reveal.js slideshow.
snapshot-latest-successful-notebooks
notebooker-cli snapshot-latest-successful-notebooks [OPTIONS]
Options
-
--report-name<report_name>¶ Required The name of the template to retrieve, relative to the template directory.
start-webapp
notebooker-cli start-webapp [OPTIONS]
Options
-
--port<port>¶ The port upon which the webapp will be running.
-
--logging-level<logging_level>¶ The logging level. Set to DEBUG for lots of extra info.
-
--debug¶ Enables Flask’s DEBUG mode (see https://flask.palletsprojects.com/en/2.0.x/config/#DEBUG). Also sets TEMPLATES_AUTO_RELOAD to True (see https://flask.palletsprojects.com/en/2.0.x/config/#TEMPLATES_AUTO_RELOAD).
-
--base-cache-dir<base_cache_dir>¶ Where the filesystem-based short-term cache stores its data.
-
--disable-scheduler¶ If –disable-scheduler is given, then the scheduling back-end of the webapp will not start up. It will also not display the scheduler from the front-end of the webapp.
-
--scheduler-mongo-database<scheduler_mongo_database>¶ The name of the mongo database which is used for the scheduling back-end. Defaults to the same as the serializer’s mongo database.
-
--scheduler-mongo-collection<scheduler_mongo_collection>¶ The name of the mongo collection within the scheduler-mongo-database which is used for the scheduling back-end. Defaults to the same as the serializer’s mongo collection + ‘_scheduler’.
-
--readonly-mode¶ This mode disables the ability to execute notebooks via REST or the webapp front-end. Useful if you only want to display results which were e.g. executed by an external application.
Read-only mode
Note
Available from version 0.5.1 onwards.
There exists a read-only mode (add --readonly-mode to command line arguments) in the
Notebooker webapp which will disable the ability to run new,
rerun, or delete existing reports. This mode is useful in situations where you would like Notebooker
reports to be executed by a trusted process (e.g. the internal scheduler, or an external job scheduling engine)
but you don’t want users to be able to directly execute Notebooks. This is suited well to production
environments or where the reports can reveal sensitive data if misconfigured.
Note
Please note that read-only mode does not change the functionality of the scheduler; users will still be able to
modify schedules and it will execute as intended. To disable the scheduler you can add --disable-scheduler
to the command line arguments of the webapp; likewise git pulls can be prevented by using --disable-git.
